Copyright © February 3, 2003 by Sandra L. Willis for Sandy's Place
This tutorial is written for PSP v7
For this tutorial you will need:
PSP 7 (will probably work in 6 but I have not tried it yet)
The "Neu! Filter" by Sandy Blair
Unzip to your plugin folder.
Lets get started:
1. Open a new workspace 350 x 450, transparent background, 16 million colors.
2. Set foreground and background colors to white, #FFFFFF.
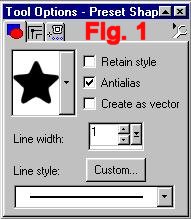
3.Select your Preset tool, and set it for the star as in Figure 1.
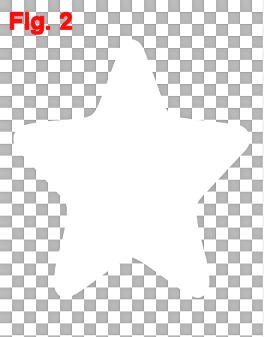
4. Starting in the center at coordinates 175/225, right click and draw out a large star as in figure 2.
5. Activate your Selection tool  . .
6. Then Select All/ and tap the star to surround it with "marching ants".
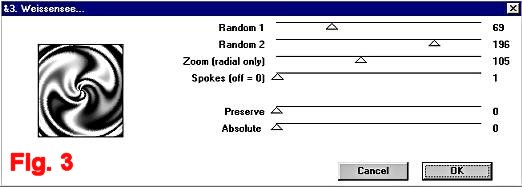
*NOTE* Because the Neu! Filter has an underline in the name, it will be found at or near the very top of your list of filters, NOT in the N's where you would expect it!*NOTE*
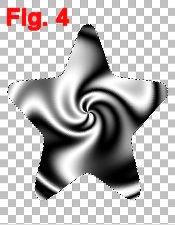
7. Go to Effects/Plugins/Neu!/Weissensee move the Random2 slider to 196 and move the Spokes slider to 1, as in figure 3.
8. Click OK, and now your picture looks like this:
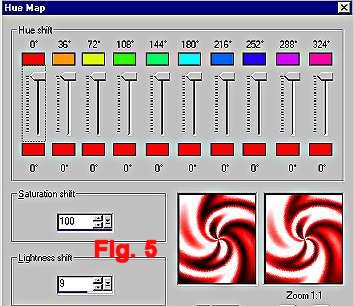
9.Now we need to color our picture. There are several methods that work. Choose your favorite method. You can go to Colors/Adjust/Hue Map and change the settings like figure 5. Or you can use Colors/Colorize with a setting of 255/255. Or you can use Retouch/Color to Target with foreground color set to "Basic Red ~ #FF0000.
10. Deselect. (HINT~ Tap the background outside the star, or use Ctrl + D)
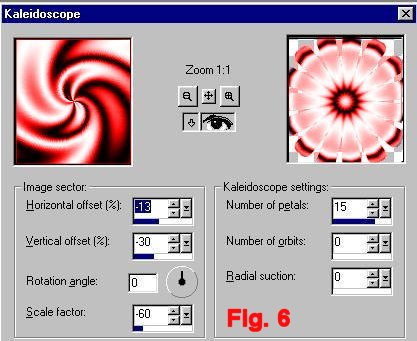
11. Go to Effects/Reflection/Kaleidoscope and use the settings in Figure 6
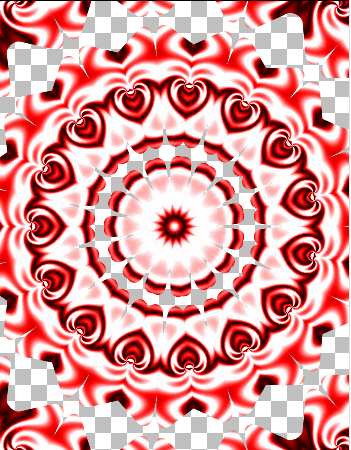
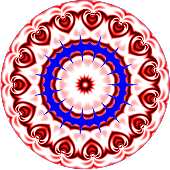
12. Click OK, and now your picture looks like this:
13. Activate your Selection tool .
14. Change setting to circle.
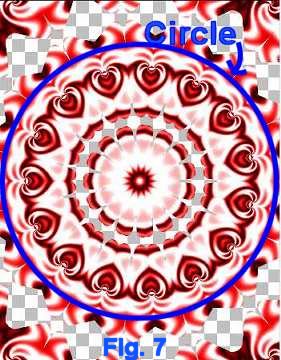
15. Starting in the center, 175/225, draw out a circle to just beyond the white portion that goes all the way around. Figure 7 shows where to draw the circle, but yours will be marching ants from the selection tool, not blue!
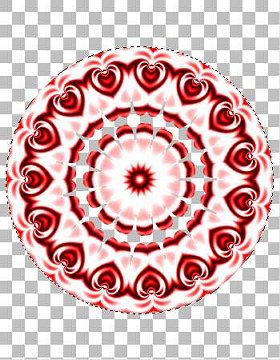
16. Go to Selections/Invert and then click Delete. All that extra stuff around the sides should be gone now.
17. Now we are going to fill in that empty space near the center.
18. Go to Selections/Invert again.
19. Make a new Raster Layer, and send or drag to bottom of the layer palette.
20. Flood fill with the color of your choice.
 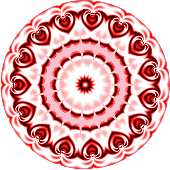
21. Deselect.
22. Merge layers.
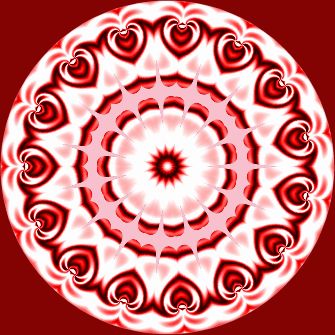
23. Your Valentine Hearts Medalion is now finished. Save it as a .psp or .jpg, or tube it.
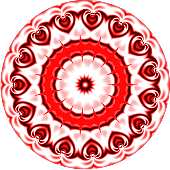
24. Here are a couple of ideas to get you started:
 
|