Copyright © January 27, 2003 by Sandra L. Willis for Sandy's Place
This tutorial is written for PSP v7
For this tutorial you will need:
PSP 7 (will probably work in 6 but I have not tried it yet)
The "Neu Filter" by Sandy Blair
Unzip to your plugin folder.
My ornament top or a top of your choice. Unzip to your tube folder.
Lets get started:
1. Open a new workspace 300 x 300, transparent background, 16 million colors.
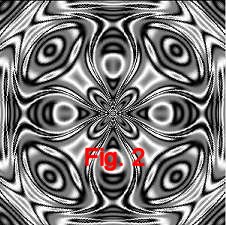
2. Go to Effects/Plugins/Neu!/Fur Immer and move the Spokes slider to 4.
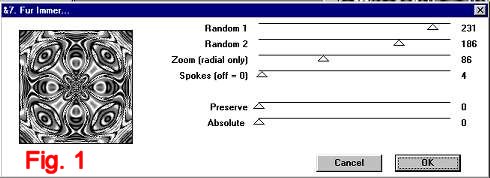
3. Click OK, and now your picture looks like this:
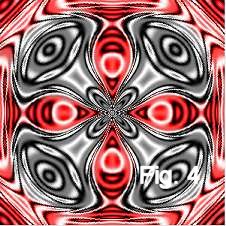
4. Set foreground color to red #FF0000.
5. Activate your Retouch tool and set it to the setting's below in Figure 3. Color the parts shown on Figure 4, changing brush size as necessary to get into the smaller places.
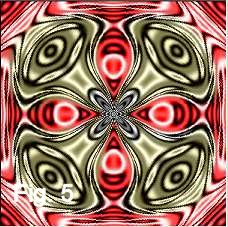
6. Set foreground color to gold #BFBB89.
7. Activate your Retouch tool and using the same setting's as above in Figure 3. Color the parts shown on Figure 5, changing brush size as necessary to get into the smaller places.
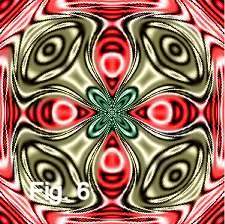
8. Set foreground color to green #205A33.
9. Activate your Retouch tool and set it to the setting's below in Figure 7. Color the parts shown on Figure 6, changing brush size as necessary to get into the smaller places.
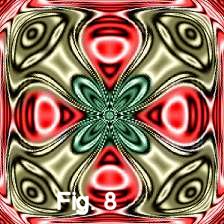
10. Go to Effects/Geometric/Punch and set the effect slider to 50%, click OK. Now your picture looks like this:
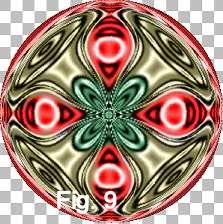
11. Go to Effects/Geometric/Circle and apply. Now your picture looks like this:
12. Go to Image/Canvas Size/ and set new width and height as 400 x 400. Centering the image both vertically and horizontally.
13. Go to Effects/Geometric/Punch and set the effect slider to 12%, click OK. Now your picture looks like this:
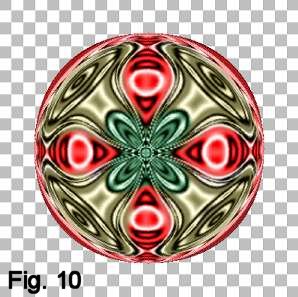
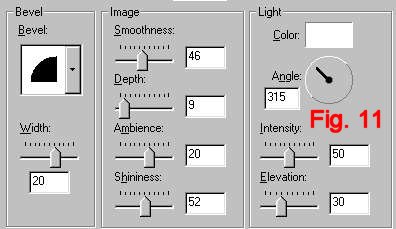
14. Go to Effects/3D/Inner Bevel and apply the settings in Fig 11.
15. Activate your selection tool, then go to Selections/Select All then tap the ball to enclose the shape with marching ants.
16. Go to Selections/Defloat.
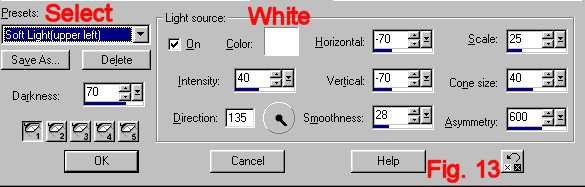
16. Go to Effects/Illumination Effects/Lights and use the settings in Figure 13 remembering to change the color to white, and selecting the preset Soft Light (Upper Left).
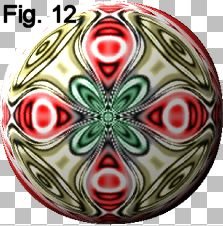
17. Deselect.
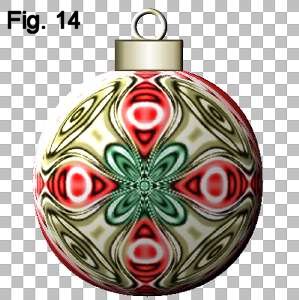
18. Your picture should now look like this:
19. Add a new layer and apply my tube for the ornament top or use your favorite top.
20. Merge these two layers with Layers/Merge/Merge Visible.
21. Go to Colors/Adjust/Brightness/contrast with the Brightness set to 17 and the contrast set to 9.
22. Your picture should now look like this:
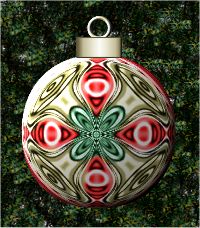
23. Your Christmas ornament is now finished. Save it as a .psp or .jpg, or tube it.
|