Sandy's Place
Bonus Page for Neu Flower Tutorial
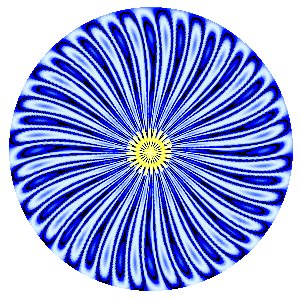
Batchelor Button
| 
| |
1. Open 300 x 300, transparent, 16 million color workspace.
2. Go to Effects/Plugins/Neu/Im Glück ~ settings Zoom/83, Spokes 24.
3. Select with circle the central part, go to Selections/Invert Selections/Delete.
4. Duplicate layer, move to bottom, flood fill with a nice medium blue
5. Click on original layer duplicate 2 more times. Set layer blend as follows (top to bottom) 1. normal, 2. burn. 3. dodge (set opacity at 35), 4. normal
6. If you want the yellow center, after going to windows/duplicate, on the original layer color the center with yellow using Retouch/color to target. Then I cut this part out using the lasso tool and did copy/ paste as new layer on the top of the stack on the duplicate window.
|
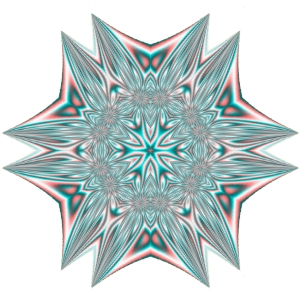
Snowflake Negativland
| 
| |
1. Open 300 x 300, transparent, 16 million color workspace.
2. Go to Effects/Plugins/Neu/Negativland ~ settings, Random1/59, Random2/105, Zoom/22, Spokes/15.
3. Apply these Effects/Geometric/Pinch (slider set at 99), Circle, Circle,Pinch/99 [that is 4 steps all done to the original layer.]
4. Go to Effects/Artistic Effects/Colored Foil ~ use these settings, Preset - Light, Blur 5, Detail 5, Angle 44, color #A20606
5. Go to Effects/Reflection Effects/Kaleidoscope ~ use these settings, Horizontal/50, Vertical/16, Rotation Angle/180, Scale Factor/-24, Petals/6, Orbits/0, Radial Suction/0
6. Step 5 finished the example, but another rendition can be made by applying the Kaleidoscope again with the same settings.
7. You may need to erase some outlying points.
|
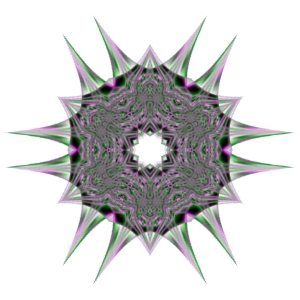
Snowflake Lieber Honig
| 
| |
1. Open 300 x 300, white, 16 million color workspace.
2. Go to Effects/Plugins/Neu/Lieber Honig ~ settings, Random1/40, Random2/60, Zoom/10, Spokes/10.
3. Apply these Effects/Geometric/Pinch (slider set at 99), Circle, Circle,Pinch/99, Pinch/99 [that is 5 steps on this layer]
4. Go to Effects/Artistic Effects/Colored Foil ~ use these settings, Preset - Light, Blur 5, Detail 5, Angle 44, color #800080
5. Duplicate this layer, then go to Image/Rotate/Left/Free/45 ~ apply.
6. Change layer blend mode on both layers to ~ Exclusion
7. Merge layers. Then go to Effects/Reflection Effects/Kaleidoscope ~ use these settings, Horizontal/50, Vertical/16, Rotation Angle/180, Scale Factor/-24, Petals/6, Orbits/0, Radial Suction/0
8. You may need to erase some outlying points.
|
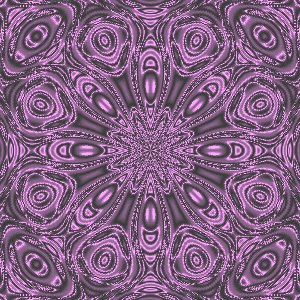
Purple Eyes Fur Immer
| 
| |
1. Open 300 x 300, white, 16 million color workspace.
2. Go to Effects/Plugins/Neu/Fur Immer ~ settings, Zoom/86, Spokes/8.
3. Go to Colors/Adjust/Red/Green/Blue and put in these settings ~ Red/100%, Green/0%, Blue/100%
4. Go to Effects/Artistic Effects/Chrome and use these settings, Flaws/1, Brightness/61, Color/#E174E2, Use original color/unchecked.
Back to Neu Flower Tutorial
Copyright © January 23, 2003 Sandy's Place Neu Flower Tutorial All Rights Reserved.
Do not add this tutorial to any collection, or copy and pass this tutorial around in groups. Groups may use this tutorial for group lessons by providing a text link only. Do not copy and store this tutorial on your own server. Any questions, E-mail me.
| | |